Step-by-Step Guide to Embroidering Glasscases
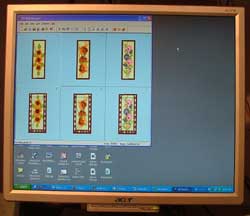 |
1. Transfer embroidery file you received from us to the memory card of your embroidery machine. The embroidery file, together with the color card are compressed into a ZIP file. Unzip the file to a folder on your computer using WinZip or a similar program. Color card you can print or open on your monitor but don't forget to mark steps "done". |
 |
2. Select the required colors, using the description in our color chart that came with embroidery file (it has the same name as embroidery file + "info" extention.) We strongly recommend to use the same bobbin color as your thread for first (background) and last (frame) colors. |
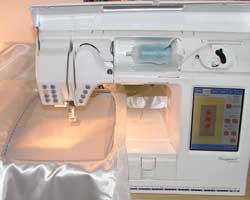 |
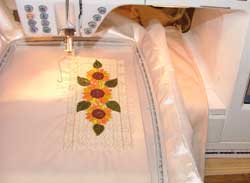
3. Use a hoop of size 5" x 7". Hoop the fabric and stabilizer. Install the loop onto your embroidery machine and embroider each color in turn. |
 |
4. At every pause, carefully take the hoop off and remove all jump stitches. (It is necessary if you see "remove jumps here" in our color chart after some colors, otherwise you could remove all jumps at the end of embroidering) |
 |
5. Before embroidering the final color - the frame - stretch some material across the back of the embroidery. It should be silkier fabric, we like velvet. It will hide the threads at the back of the embroidery. In our color chart you'll see "put your back fabric here" instruction on this step. |
 |
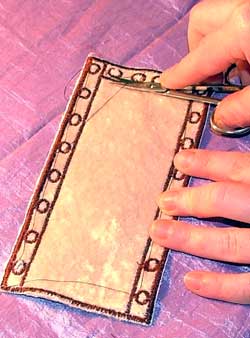
6. After the next stop take the hoop off... |
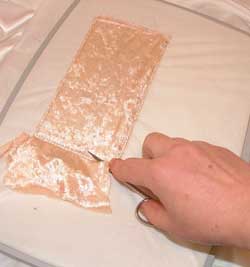 |
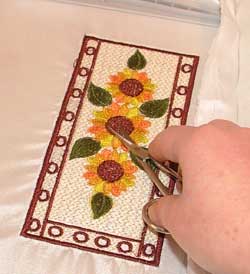
7. ...and carefullly cut your back fabric edges like applique - as close to the seam as you can.
|
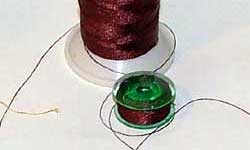 |
8. Don't forget to change bobbin before the final color. |
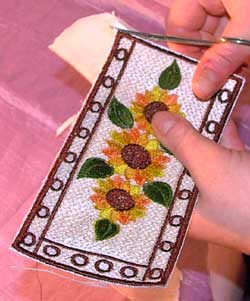 |
9. Embroder the final color (frame and small circles - you'll see how we'll use them later). Remove the finished embroidery from the machine, take it out of the hoop and carefuly cut neatly along the edge of the motif.
|
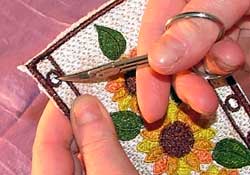 |
10. Take very sharp scissors and make holes along the perimeter of left, right and bottom sides of the glasscase (at the center of each embroidered circle)
|
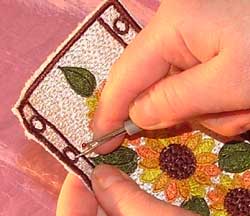 |
11. ...or use special gadget to make the holes.
|
 |
12. Remove jumps from the back side.
|
 |
13. Repeat steps 1-12. You can stitch the same design, or any other design from the set (all glasscase designs in one set are always compatible) or design named "glass-back" - you received it in the set, it is plain back side without any pattern. If you make a gift, you could add to it initials, name or your personal greeting. |
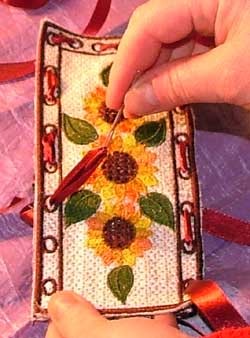 |
14. Press the two embroideries together, back to back, and "sew" them together with fine ribbon (use needle with large eye). You can use simple satin ribbon as on the photo, or something more interesting like gold or silver ribbon. You can add beads or tassels for decoration. |
Your glasscase is ready!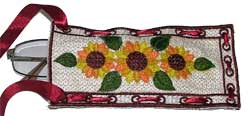 |
|
| Add to this fine glasscase a couple of matching bookmarks - and you have a great gift. |
|

|
Use the following sets to create a similar project: 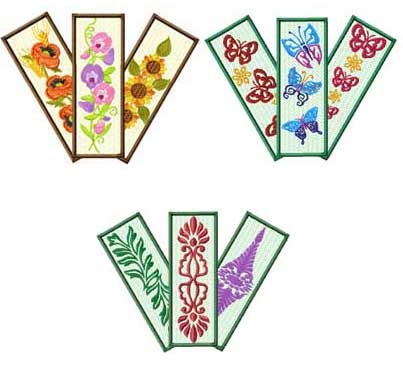
|
 Hey there!
 50% off all designs – the discount will be applied automatically in your cart.
 Free design:
 Still Free! design: